How Van de Graaff Generators Work

John Zavisa and his son experiencing a close encounter with a Van de Graaff generator!

Most of us have seen the device, known as a Van de Graaff generator, that makes your hair stand on end. The device looks like a big aluminum ball mounted on a pedestal, and you can see its effect in the accompanying image.

Have you ever wondered what this device is, how it works, why it was invented or how you might build one yourself? Surely it wasn't invented to make people's hair stand on end ... Or have you ever shuffled your feet across the carpet on a dry winter day and gotten the shock of your life when you touched something metal? Have you ever wondered about static electricity and static cling?

Advertisement

If any of these questions have ever crossed your mind, then get ready for a great read. In this edition of HowStuffWorks, we'll discuss Van de Graaff generators and static electricity in general. You'll even learn how to build your own Van de Graaff generator!

Static Electricity

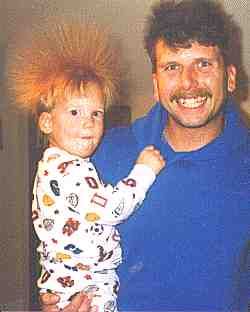
To understand the Van de Graaff generator and how it works, you need to understand static electricity. Almost all of us are familiar with static electricity because we can see and feel it in the winter. On dry winter days, static electricity can build up in our bodies and cause a spark to jump from our bodies to pieces of metal or other people's bodies. We can see, feel and hear the sound of the spark when it jumps.

In science class you may have also done some experiments with static electricity. For example, if you rub a glass rod with a silk cloth or if you rub a piece of amber with wool, the glass and amber will develop a static charge that can attract small bits of paper or plastic.

Advertisement

To understand what is happening when your body or a glass rod develops a static charge, you need to think about the atoms that make up everything we can see. All matter is made up of atoms, which are themselves made up of charged particles. Atoms have a nucleus consisting of neutrons and protons. They also have a surrounding "shell" that is made up electrons. Typically, matter is neutrally charged, meaning that the number of electrons and protons are the same. If an atom has more electrons than protons, it is negatively charged. If it has more protons than electrons, it is positively charged.

Some atoms hold on to their electrons more tightly than others do. How strongly matter holds on to its electrons determines its place in the triboelectric series. If a material is more apt to give up electrons when in contact with another material, it is more positive in the triboelectric series. If a material is more apt to "capture" electrons when in contact with another material, it is more negative in the triboelectric series.

The following list describes the triboelectric series for many materials you find around the house. Positive items in the series are at the top, and negative items are at the bottom:

  • Human hands (usually too moist, though) Very positive
  • Rabbit fur
  • Glass
  • Human hair
  • Nylon
  • Wool
  • Fur
  • Lead
  • Silk
  • Aluminum
  • Paper
  • Cotton
  • Steel Neutral
  • Wood
  • Amber
  • Hard rubber
  • Nickel, Copper
  • Brass, Silver
  • Gold, Platinum
  • Polyester
  • Styrene (Styrofoam)
  • Saran Wrap
  • Polyurethane
  • Polyethylene (like Scotch Tape)
  • Polypropylene
  • Vinyl (PVC)
  • Silicon
  • Teflon Very negative

(The above list is adapted from the book Nature's Electricity by Charles K. Adams.)

The relative position of two substances in the triboelectric series tells you how they will act when brought into contact. Glass rubbed by silk causes a charge separation because they are several positions apart in the table. The same applies for amber and wool. The farther the separation in the table, the greater the effect.

When two non-conducting materials come into contact with each other, a chemical bond, known as adhesion, is formed between the two materials. Depending on the triboelectric properties of the materials, one material may "capture" some of the electrons from the other material. If the two materials are now separated from each other, a charge imbalance will occur. The material that captured the electron is now negatively charged and the material that lost an electron is now positively charged. This charge imbalance is where "static electricity" comes from. The term "static" in this case is deceptive, because it implies "no motion," when in reality it is very common and necessary for charge imbalances to flow. The spark you feel when you touch a door knob is an example of such flow.

In the next section we'll look at the many factors that affect the size of a static electricity shock.

Shock Factors

You may wonder why you don't see sparks every time you lift a piece of paper from your desk. The amount of charge is dependent on the materials involved and the amount of surface area that is connecting them. Many surfaces, when viewed with a magnifying device, appear rough or jagged. If these surfaces were flattened to allow for more surface contact to occur, the charge (voltage) would most definitely increase.

Another important factor in electrostatics is humidity. If it is very humid, the charge imbalance will not remain for a useful amount of time. Remember that humidity is the measure of moisture in the air. If the humidity is high, the moisture coats the surface of the material, providing a low-resistance path for electron flow. This path allows the charges to "recombine" and thus neutralize the charge imbalance. Likewise, if it is very dry, a charge can build up to extraordinary levels, up to tens of thousands of volts!

Advertisement

Think about the shock you get on a dry winter day. Depending on the type of sole your shoes have and the material of the floor you walk on, you can build up enough voltage to cause the charge to jump to the door knob, thus leaving you neutral. You may remember the old "static cling" commercial. Clothes in the dryer build up an electrostatic charge. The dryer provides a low-moisture environment that rotates, allowing the clothes to continually contact and separate from each other. The charge can easily be high enough to cause the material to attract and "stick" to oppositely charged surfaces (your body or other clothes, in this case). One method you could use to remove the "static" would be to lightly mist the clothes with some water. Here again, the water allows the charge to leak away, thus leaving the material neutral.

It should be noted that when dirt is in the air, the air will break down much more easily in an electric field. This means that the dirt allows the air to become ionized more easily. Ionized air is actually air that has been stripped of its electrons. When this occurs, it is said to be plasma, which is a pretty good conductor. Generally speaking, adding impurities to air improves its conductivity. Having impurities in the air has the same effect as having moisture in the air. Neither condition is at all desirable for electrostatics. The presence of these impurities in the air usually means that they are also on the materials you are using. The air conditions are a good gauge for your material conditions -- the materials will generally break down like air, only much sooner.

The Generator

Now that you understand something about electrostatics and static electricity, it is easy to understand the purpose of the Van de Graaff generator. A Van de Graaff generator is a device designed to create static electricity and make it available for experimentation.

The American physicist Robert Jemison Van de Graaff invented the Van de Graaff generator in 1931. The device that bears his name has the ability to produce extremely high voltages -- as high as 20 million volts. Van de Graaff invented the generator to supply the high energy needed for early particle accelerators. These accelerators were known as atom smashers because they accelerated sub-atomic particles to very high speeds and then "smashed" them into the target atoms. The resulting collisions created other subatomic particles and high-energy radiation such as X-rays. The ability to create these high-energy collisions is the foundation of particle and nuclear physics.

Advertisement

Van de Graaff generators are described as "constant current" electrostatic devices. When you put a load on a Van de Graaff generator, the current (amperage) remains the same. It's the voltage that varies with the load. In the case of the Van de Graaff generator, as you approach the output terminal (sphere) with a grounded object, the voltage will decrease, but the current will remain the same. Conversely, batteries are known as "constant voltage" devices because when you put a load on them, the voltage remains the same. A good example is your car battery. A fully charged car battery will produce about 12.75 volts. If you turn on your headlights and then check your battery voltage, you will see that it remains relatively unchanged (providing your battery is healthy). At the same time, the current will vary with the load. For example, your headlights may require 10 amps, but your windshield wipers may only require 4 amps. Regardless of which one you turn on, the voltage will remain the same.

There are two types of Van de Graaff generators: one that uses a high-voltage power supply for charging and one that uses belts and rollers for charging. Here we will discuss the belts-and-rollers type.

This kind of Van de Graaff generator is made up of:

  • A motor
  • Two rollers
  • A belt
  • Two brush assemblies
  • An output terminal (usually a metal or aluminum sphere)

When the motor is turned on, the lower roller (charger) begins turning the belt. Since the belt is made of rubber and the lower roller is covered in silicon tape, the lower roller begins to build a negative charge and the belt builds a positive charge. You can understand why this charge imbalance occurs by looking at the triboelectric series: Silicon is more negative than rubber; therefore, the lower roller is capturing electrons from the belt as it passes over the roller.

In the next section we'll look at how the charge is concentrated.

The Concentration of Charge

It is important to realize that the charge on the roller is much more concentrated than the charge on the belt. Because of this concentration of charge, the roller's electric field is much stronger than the belt's at the location of the roller and lower brush assembly. The strong negative charge from the roller now begins to do two things:

  1. It repels the electrons near the tips of the lower brush assembly. Metals are good conductors because they are basically positive atoms surrounded by easily movable electrons. The brush assembly now has wire tips that are positively charged because the electrons have moved away from the tips, toward the connection at the motor housing.
  2. It begins to strip nearby air molecules of their electrons. When an atom is stripped of its electrons, it is said to be plasma, the fourth state of matter. So we have free electrons and positively charged atoms of air existing between the roller and the brush. The electrons repel from the roller and attract to the electronless brush tips while the positive atoms attract to the negatively charged roller.

The positively charged atomic nuclei from the air molecules try to move toward the negatively charged roller, but the belt is in the way. So now the belt gets "coated" with the positive charge, which it then carries away from the roller.

Advertisement

As long as there is air between the lower roller and brush assembly, the Van de Graaff generator will continue to charge the belt. Theoretically, the Van de Graaff generator can continue to charge forever. Unfortunately, dirt and other impurities in the surroundings will limit the actual charge that develops on the sphere.

Let's return to the belt. The belt, as we left it, is positively charged and rolling toward the upper roller and upper brush assembly. Since I used nylon for my upper roller, it wants to repel the charge on the belt. The upper brush assembly is connected to the inside of the sphere and hangs near the upper roller and belt location. The electrons in the brush move to the tips of the wires because they are attracted to the positively charged belt. Once the air breaks down as before, the positive atomic nuclei of air are attracted to the brush. At the same time, the free electrons in the air move to the belt. When a charged object touches the inside of a metal container, the container will take all of the charge, leaving the object neutral. The excess charge then shows up on the outside surface of the container. Here, our container is the sphere. It is through this effect that the Van de Graaff generator is able to achieve its huge voltages. For the Van de Graaff generator, the belt is the charged object, delivering a continuous positive charge to the sphere.

One last note before going on to building your own Van de Graaff generator. Normally, a neutral material is used for the upper roller, so the belt becomes neutral after the sphere sucks its excess charge away. Because I've used a nylon upper roller (which is positive on the triboelectric series), I cause the belt to actually deliver more positive charge and become negative. This is a technique used for doubling your current. The belt is positive on one side as it approaches the upper roller and negative on the other side as it approaches the lower roller.

Build Your Own!

If you are mechanically adept, it is easy to build your own Van de Graaff generator from scratch (if not, you may wish to buy a kit or a finished generator -- see the links at the end of this article for some ideas). The following is a list of the parts and materials I used to build my Van de Graaff generator.

  • Motor - I bought a used, 1/3 horsepower, 1,780-rpm motor from a local motor repair shop.
  • Belt - I used a piece of surgical tubing. DO NOT USE BLACK RUBBER! The belt must be an insulator.
  • Lower roller - I used a piece of nylon, 3 inches in diameter and 3 inches long, with a crown in the middle. The roller was drilled to accept a 5/8-inch motor shaft with key and covered with silicon tape (available at a hardware store or online at McMaster-Carr -- use 1" wide and 20 mm thick).
  • Upper roller - I used a piece of nylon, 2 inches in diameter and 2 inches long, with a crown in the middle.
  • Upper and lower brush - I used two pieces of multistranded, braided grounding straps.
  • Sphere - I used two stainless steel salad bowls resting rim to rim.

Rollers. I would advise any serious builder to use the negative-roller/positive-roller technique. The results are much better than having one roller neutral. Get an idea of what materials you want to use and then go search the local hardware stores. There are many materials on the triboelectric list that can be found with slight to moderate searching. Avoid using aluminum foil or any other metal that can tear or flake. If the aluminum flakes, it will get on the belt, thus shorting out the Van de Graaff generator. You should try to put a crown in the rollers (make the middle bulge out like a keg). The crown will cause the belt to track the middle of the roller, thus eliminating the potential for the belt to slip off.

Advertisement

Belt. The surgical tubing that I use performs flawlessly. It's extremely durable, easy to keep clean (wipe with rubbing alcohol), and easy to work with. Purchase the tubing at a good hardware store or a medical supply store. You will then need to cut the tubing to make a flat strip. Do this with scissors or by inflating the tubing. To form a belt, form the strip into a circle and overlap the ends slightly. Cut a 45-degree angle through the overlapped portion (cut all the way through). Now butt the two ends together and bond them with rubber glue. The 45-degree seam will help the belt to travel over the rollers when the seam reaches them.

Remember that the belt must not be conductive. Avoid using any material that is black -- it probably contains carbon, which is conductive at the high voltages a Van de Graaff generator develops. The belt width should be as close to the roller width as possible. You want to ensure that the brush is "coating" the belt and not losing charge to the roller.

Brushes. The brushes must be a conductive material such as metal. I've found that the smaller and the sharper the brush tips, the better the performance. Try placing the brushes at various distances to the rollers. Do not allow the brushes to contact the belt. This will cause debris to build up and will ruin your belt. Unbraiding the fine wires in grounding strap wire works well and is recommended.

Motor. The motor is arguably the least critical aspect of the Van de Graaff generator. Obviously, you want one with enough horsepower to drive the belt. Try looking at local motor repair shops. I even used a circular-saw motor at one point. For the motor speed, I would not use anything less than 1,000 rpm. The speed determines how fast a Van de Graaff generator charges up (do not confuse this with how much charge is built up).

Sphere. Any hollow metallic sphere will work fine. The two salad bowls that I use had some leakage where the rims came together. I remedied this by sealing the seam with epoxy and covering it with electrical tape.

Constructing the Generator

Here are the initial steps:

  1. Mount the lower roller to the motor shaft.
  2. Mount the lower brush assembly to the motor housing.
  3. Enclose the lower unit.

Do not use wood for the enclosure: Wood is easy to work with, but it does absorb moisture from the air, which can adversely effect the Van de Graaff generator. Make the case from plastic -- Plexiglas from a hardware store works well. Remember to leave access to set the belt to your roller and to leave an opening at the top to route the belt to the top roller.

Advertisement

For the column assembly, I used a 6-inch-diameter, 32-inch-long piece of PVC tube. I mounted one end of the tube to the top of the housing and drilled holes in the other end of the tube. You mount your upper roller to the top of the tube via a bolt or rod through the drilled holes. Depending on how your upper roller mounts to the tube, you may want to put the belt on the roller before you mount it. After the top roller is mounted, you can then attach the other end of the belt to the lower roller and close your housing.

Finally, you are ready to mount the sphere and upper brush assembly. To do this, I cut a hole in the bottom of one of the salad bowls. I then used conductive "metal bond" to secure the braided grounding strap to the inside of the bowls. Next, I mounted the bowls to a 6-inch to 4-inch PVC reducer. I inserted the 4-inch end of the reducer into the hole in the bowl and then coated it with silicon caulk. I then routed the brush end of the grounding strap to the inside of the reducer and mounted it (you may have to play with this a bit in order to get the best separation distance from the upper roller assembly).

At last, all you have to do now is put the reducer over the top of the PVC. Make sure that the brush is facing the belt and on the same side as the lower brush. You have your very own Van de Graaff generator!

It's a good idea to ground a piece of wire to the motor housing, because you can then touch the other end of the wire to the sphere when you turn it off. This will keep you from getting a nasty little pop when you touch the switch. Also, you may want to discharge the sphere without turning it off. Keep in mind, though, that if you do not hold the end of the wire during operation you will get a little pop when you pick it up.

Experiments

There are millions of interesting experiments you can perform with your new Van de Graaff generator, but I will concentrate on the "hair raising" one. Have the lucky participant stand on top of an insulated surface (a Rubbermaid container top works well). It is critical for the person to be insulated from ground. If the charge cannot build up on the person, his/her hair will not stand up. Now, have the person put a hand on the sphere. Turn on the Van de Graaff generator and watch it go!

When the Van de Graaff generator starts charging, it transfers the charge to the person who is touching it. Since the person's hair follicles are getting charged to the same potential, they try to repel each other. This is why the hair actually stands up. It would not make a difference if the polarity of the Van de Graaff generator were reversed. As long as the person is insulated, the charge will build up (assuming, of course, that the hair is clean and dry).

Advertisement

My Van de Graaff generator will create sparks about 10 to 12 inches in length. I like to charge myself on it and point at the aluminum blinds on the window. The charge (electronic wind) will cause the blinds to move. I can do this from about 8 feet away with ease. Soap bubbles are also interesting to play with around the Van de Graaff generator. They initially are attracted to the Van de Graaff generator and float toward it; once they become charged by the Van de Graaff generator, they float away due to repulsion. There are multitudes of fun things you can do with your Van de Graaff generator. Use your imagination!

For more information, check out the links on the next page!

Lots More Information

Related HowStuffWorks Articles

More Great Links!