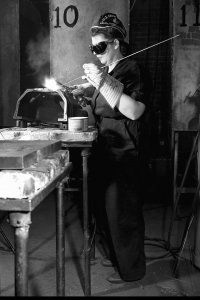
Brazing Procedure
Brazed joints are incredibly strong -- stronger than the metals being joined in most cases -- but only if a metalworker follows good brazing procedure. Like welders, tradesmen who practice brazing techniques often receive training in certified programs. These programs help participants understand which variables affect the quality of brazing and how to evaluate solutions based on cost and performance.
Almost all courses cover the "Six Fundamentals of Brazing" -- the six essential steps that, if followed correctly, consistently produce high-quality joints. Let's review those steps now to see how a metalworker executes a brazed joint.
Advertisement
- A fantastic fit: As we discussed earlier, brazing relies on capillary action, and capillary action works best if the space between the metals to be joined falls in a certain range -- between 0.001 and 0.005 inches (0.0025 and 0.0127 centimeters) [source: Belohlav]. Before a metalworker enters the shop, she must spend some time drawing up engineering specs. She must understand the structural requirements of the project and then design a joint to make sure the final assembly performs properly. She may choose a lap joint (where two metal pieces overlap), a butt joint (where two metal pieces fit end-to-end) or a tee joint (where two metal pieces connect at a right angle). Then she must account for the properties of the metal being used. All metals expand when they're heated, so the brazing procedure must allow for this. If not, the joint may be too tight or too wide and, as a result, weaker than necessary.
- A clean slate: Contaminants in the joint can interfere with good capillary action. For example, heat can carbonize oil and grease, which can form a film that impedes the flow of the filler metal. To avoid this, surfaces should be free of dust, grease, oil or rust. A steel brush can remove dirt and oxide contaminants, while solvents can dissolve oil.
- Flux before flame: Heating a metal surface initiates a chemical reaction in which metal atoms combine with oxygen. This produces oxides, which can prevent the filler metal from wetting the joint surfaces. Applying a coating of certain chemicals can block or neutralize the oxidation process. These chemicals are known as flux, and they can vary in chemical composition depending on the brazing conditions. Many fluxes come in paste form and can be applied manually by brush or dipping. In automated production environments, spray guns may be used to apply dry flux powder to surfaces.
- Clamp and support: If you're joining two pieces of metal, you need them to remain aligned until the brazing process can be completed. For most projects, gravity provides enough force to hold parts together until the brazed joint cools. Otherwise, clamps and vises may be helpful. A complex assembly may require a support fixture -- a device that supports several pieces of metal in a precise configuration until brazing is completed. Metalworkers usually look for stainless steel or ceramic fixtures because, as poor conductors of heat, they don't pull as much heat away from the base metals.
- Braze away! After fluxing the joint and clamping the piece, it's time to heat things up. In brazing, a metalworker doesn't apply heat directly to the filler. Instead, he increases the temperature of the base metals until they reach the melting point of the filler. If it's small, the entire assembly can be heated. If it's large, a broad area of metal surrounding the joint can be heated. Uniform heating is critical, so metalworkers must be aware of the piece's basic structure. For example, thick sections of metal will require more heating than thin sections. Similarly, metals with different heat conductivities must be warmed at different rates. When the assembly reaches the brazing temperature, the metalworker can remove the heat source and introduce the filler. The most basic technique calls for him to touch a rod or wire to the joint surface. The intense heat melts the rod, and capillary action pulls the molten metal into the gap between the base metals. He must be careful not to apply the filler too far from the joint, as the liquefied filler may run over the metal surfaces without flowing into the joint.
- A clean slate, part 2: As the temperature of the assembly falls, the filler metal will solidify, securing the individual pieces as it does. The final step is to clean away the flux material, which can, if not removed, corrode and weaken the joint. A common technique involves submerging the entire structure in a hot water bath. This causes the flux material, glass-like after the heating process, to crack and flake off. Rubbing the joint with a brush or steel wool can remove any flux that clings to the metal surface.
