Bottling, Kegging and Homebrewing
The most important thing about the bottling and kegging process is to keep the beer from being contaminated by stray yeasts, and to keep oxygen away from the beer. These are the main things that can reduce the shelf-life of beer.
The ways that the beer is transferred into bottles and kegs is pretty similar; but bottling has a few extra steps, so we'll talk about bottling.
Advertisement
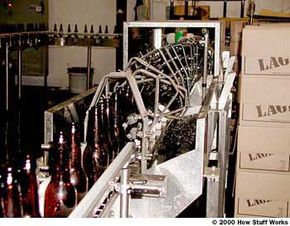
The bottling line at the Carolina Brewery can fill up to 100 12-oz (355 ml) bottles of beer every minute. To start the process, the empty bottles are loaded onto the bottling line, where they are first rinsed with a chlorine solution, and then blasted with CO2 to remove the solution.
Next, the bottles enter a turret-like mechanism that can hold 12 bottles at once. Each bottle rides around the turret once. During its ride, the bottle is purged with CO2 several times before it is filled. The bottles are pressurized with CO2 so that when the beer is forced into the bottles under pressure it doesn't foam up too much. After the beer has been added to the bottles, the pressure is slowly relieved until the beer is at ambient pressure. As each filled bottle leaves the turret, an empty one takes its place.
Next comes the capping machine -- but now there is a little bit of air space at the top of the bottle that needs to be purged. To do this, the bottle is passed under a very narrow, high-pressure jet of water that hits the beer, causing it to foam up and drive the air out of the bottle. The cap is then applied before any air can re-enter the bottle.
After the cap is applied, the outside of the bottle is rinsed to remove any beer that may have foamed out during the process.
Surprisingly, the most difficult part of the bottling process is applying the label to the bottle. Getting a label to stick to a cold wet beer bottle is no easy trick.
The labels are fed into the labeling machine, which has a spinning device that rolls glue onto the labels and then sticks them to the bottles as they pass by. If all goes well, the label will be properly positioned, smooth and well-adhered.
A special inkjet printer squirts the date onto the label as it moves past the print head. The date the beer was bottled and also a "best before" date (three months after the bottling date) are printed on the label.

Homebrewing
If this all sounds very complicated, then you might be wondering how people ever manage to brew their own beer. But as you may have gathered, most of the complexity of the brewing process is due to the need for a commercial brewery to turn out beer that tastes exactly the same batch after batch, year after year.
Most homebrewers have no such requirement -- it doesn't matter if the beer tastes exactly the same each time they make it. There are so many different types of beer to brew that many homebrewers never make the same type of beer twice anyway.
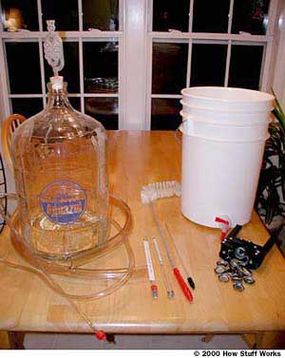
At homebrewing stores (see the links below) you can buy malt extract, which is the fermentable sugars extracted from the mash. That eliminates one fairly complicated step (although it is entirely possible to do a mash in your home). A basic set of homebrewing equipment consists of:
- Fermentation vessels (a bucket or glass water jug)
- Various hoses for siphoning beer from one container to another or to fill bottles
- An airlock so that carbon dioxide can escape the fermentation vessel but air cannot get in
- Some cleaning equipment for washing your fermenters, bottles and hoses
- Floating thermometer
- Floating hydrometer
- Bottle capper
- Funnel
All of these supplies and any ingredients you need are available at homebrewing stores, and are sometimes packaged as a kit.
For more information on beer, homebrewing and related topics, check out the links below.
